Round Corners is one of the simplest Shape Layer operators in Adobe After Effects, but it can have a surprisingly large impact on motion-graphics design.
A sharp geometric shape can quickly become softer, more modern, and more interface-friendly simply by increasing its corner radius.
You can use Round Corners to create:
- rounded rectangles;
- softer icons;
- animated UI elements;
- modern badges;
- logo components;
- geometric transitions;
- abstract motion graphics;
- responsive interface designs.
The tool becomes even more useful when combined with other Shape Layer operators such as:
- Merge Paths;
- Repeater;
- Trim Paths;
- Offset Paths.
In this guide, you’ll learn how Round Corners works, how Radius affects your paths, why it behaves differently on different Shapes, how to animate the effect, and how to combine it with other Shape Layer tools for more advanced motion design.
Affiliate disclosure: This article contains affiliate links. If you purchase Adobe After Effects through one of these links, we may earn a commission at no additional cost to you.
What Is Round Corners in After Effects?
Round Corners is a Shape Layer operator that smooths sharp vertices in vector paths.
Imagine a square.
Normally, each corner forms a sharp 90-degree angle.
Add Round Corners and increase the Radius.
The square becomes progressively softer until the corners are heavily rounded.
This is especially useful for graphics that need a modern interface or app-style appearance.
Where Is Round Corners?
Select a Shape Layer.
Expand:
Contents
Choose:
Add → Round Corners
After Effects creates:
Round Corners 1
Expand it.
The main property is:
Radius
That’s the value we’ll animate and control.
What Does Radius Do?
Radius determines how strongly the corners are rounded.
At:
Radius = 0
the Shape remains unchanged.
Increase Radius and After Effects progressively softens the sharp vertices.
For example:
0 px
sharp.
10 px
slightly rounded.
40 px
noticeably rounded.
100 px
strongly rounded, depending on the Shape dimensions.
Round Corners vs Rectangle Roundness
This is important.
A Rectangle Path already includes its own:
Roundness
property.
So why use Round Corners?
Because Round Corners can affect more general vector paths, not just Rectangle Paths.
It is useful for:
- polygons;
- custom Pen Tool paths;
- merged geometry;
- other Shape Layer paths.
When to Use Rectangle Roundness
If you’re working with a basic Rectangle Path and only need rounded corners, the built-in Roundness property is often simpler.
When to Use Round Corners
Use Round Corners when:
- the Shape isn’t a basic rectangle;
- you’re working with custom paths;
- you’ve combined geometry;
- you need a procedural smoothing operator.
If you’d like to practice Shape Layer animation yourself, you can explore Adobe’s current After Effects options here:
Explore Adobe After Effects and current plans
Your First Round Corners Animation
Let’s start with a simple polygon.
Step 1: Create a Composition
Create a new composition.
For example:
1920 × 1080
with your preferred frame rate.
Step 2: Create a Polygon
Deselect all layers.
Choose the Polygon Tool.
Draw a Shape.
Make sure it has a Fill so the corner changes are easy to see.
Rename the layer:
ROUND CORNERS TEST
Step 3: Add Round Corners
Inside:
Contents
choose:
Add → Round Corners
Open:
Round Corners 1
Step 4: Change Radius
Increase:
Radius
Watch the corners soften.
This is the basic workflow.
Step 5: Animate Radius
Set:
Radius = 0
Create a keyframe.
Move forward approximately one second.
Increase Radius.
For example:
0 → 80
Preview.
The polygon transitions from sharp to rounded.
Why This Animation Works Well
Round Corners doesn’t change the overall path intent.
It changes the character of the geometry.
This makes it useful for transitions between:
technical
and:
friendly
visual styles.
Project 1: Square to Rounded Square
Create a square.
Add Round Corners.
Animate:
Radius 0 → 60
The Shape changes from sharp and mechanical to smooth and modern.
This works well for:
- UI cards;
- app graphics;
- logo animation.
Project 2: Square to Almost-Circle
If the source Shape is small enough and the Radius becomes large enough, a square can become visually close to a circle.
Animate:
sharp square
to:
highly rounded square.
This creates a simple morph-like effect.
Is This a True Morph?
Not exactly.
The underlying path remains related to the original Shape.
Round Corners is changing the vertices procedurally rather than performing arbitrary Shape interpolation.
Still, the result can appear similar to a basic morph.
Project 3: Triangle with Rounded Corners
Create a triangle.
Add Round Corners.
Increase Radius.
The Shape becomes much softer.
This is useful for:
- play icons;
- warning symbols;
- branded geometry.
Rounded Play Button
Create a triangular Shape.
Round its corners slightly.
Place it inside a circle.
Now you have a softer play button.
Animate:
- Radius;
- Scale;
- opacity.
This creates a polished UI animation.
Project 4: Rounded Star
Create a star.
Add Round Corners.
Increase Radius gradually.
The sharp star becomes much more playful.
This can work well for:
- badges;
- ratings;
- celebratory graphics.
Be Careful with High Radius
On very complex or tightly spaced vertices, large Radius values can create unexpected geometry.
Always preview the result.
Project 5: Softening a Custom Path
Draw an irregular polygon using the Pen Tool.
Add Round Corners.
Instead of manually editing every vertex and Bezier handle, increase Radius.
After Effects automatically softens the corners.
This can save considerable time.
Round Corners on Open Paths
Round Corners can also affect open Shape paths.
This can soften angular line paths, depending on the Shape structure.
Use this for:
- infographic connectors;
- motion paths;
- abstract line graphics.
But What About Stroke Caps?
Round Corners affects path vertices.
Stroke Caps affect the ends of open Strokes.
They solve different problems.
Use:
Round Corners
for bends.
Use:
Round Cap
for line endpoints.
Project 6: Rounded Zigzag
Create a zigzag path.
Apply a thick Stroke.
Add Round Corners.
The harsh angles become smooth bends.
This can produce:
- waveform-like graphics;
- animated routes;
- decorative lines.
Round Corners + Trim Paths
This is a strong combination.
Create an angular path.
Apply Round Corners.
Add Stroke.
Add Trim Paths.
Animate:
End 0 → 100.
Now a softened path draws itself onto the screen.
Example: Rounded Route Animation
Draw a right-angle route.
Round the corners.
Add Trim Paths.
Animate the route drawing.
This creates a polished diagram or map-style line.
Project 7: Rounded UI Card
Create a rectangular Shape.
You can use either:
Rectangle Path Roundness
or:
Round Corners.
Add:
- Fill;
- subtle Stroke;
- shadow;
- text.
Animate Radius to transition between interface states.
UI State Animation
For example:
Compact square button
↓
expanded rounded panel.
Round Corners can help reinforce the transition.
Project 8: Rounded Badge
Create a polygon.
Add Round Corners.
Add:
- icon;
- text;
- accent color.
This can create a modern badge or label.
Project 9: Rounded Logo Geometry
Geometric logos often look dramatically different depending on corner treatment.
A few pixels of rounding can make a logo appear:
- softer;
- friendlier;
- more contemporary.
Animate Radius as part of the logo reveal.
Example
Start:
sharp geometric icon.
Animate:
Radius 0 → 25.
Then:
logo name appears.
This can create a subtle finishing motion.
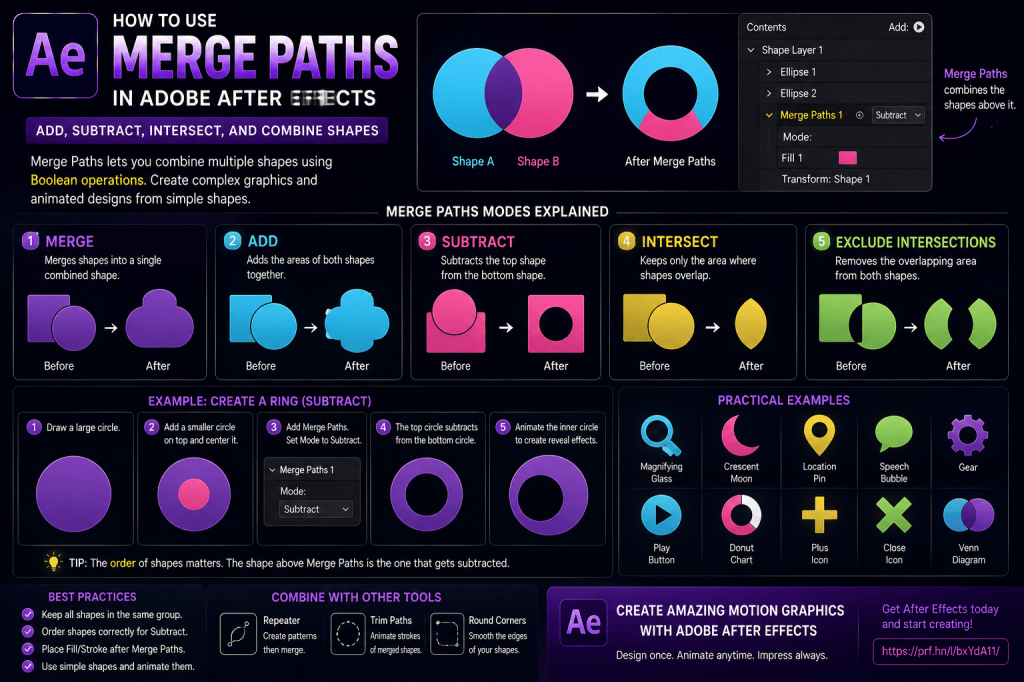
Round Corners + Merge Paths
This is particularly useful.
Create complex geometry using:
Merge Paths
Then apply:
Round Corners
to soften the result.
For example:
Two rectangles combined into a plus icon.
Then:
Round Corners.
Now the plus has smooth edges.
Operator Order Matters
Try:
Shapes
↓
Merge Paths
↓
Round Corners
This applies rounding to the merged result.
If you place Round Corners before Merge Paths, the individual source Shapes may be rounded before they’re combined.
These can produce different results.
Merge Then Round
Good for:
- unified icons;
- logos;
- combined geometry.
Round Then Merge
Good when:
each source Shape should already have softened geometry before being combined.
Experiment with Order
Shape Layer operator order is part of the design process.
There is no single universal best hierarchy.
Round Corners + Repeater
Create one rounded Shape.
Add Repeater.
Now every procedural copy inherits the softened geometry.
This is useful for:
- dot patterns;
- rounded tiles;
- UI backgrounds;
- radial designs.
Animate Radius Across a Repeated Pattern
Because the Repeater uses the original Shape, animating Round Corners changes all copies simultaneously.
This can create a dramatic transformation across an entire pattern from one property.
Example
Grid of squares
↓
animate Radius
↓
grid of rounded tiles.
Very efficient.
Project 10: Rounded Grid
Create a square.
Add Round Corners.
Add two Repeaters to build a grid.
Animate:
- Radius;
- spacing;
- Scale.
This can create a modern UI or technology background.
Project 11: Radial Rounded Shapes
Create a rectangle.
Round the corners.
Add Repeater.
Arrange copies radially.
The rounded geometry gives the radial pattern a softer appearance.
Round Corners + Expressions
The Radius property can be expression-driven.
For example, connect it to:
Slider Control.
Now the user can change the corner Radius without opening the Shape Layer.
Create a Corner Radius Control
Add:
Slider Control
Rename it:
Corner Radius
Connect:
Round Corners → Radius
to the Slider.
Now the Shape’s styling is controlled centrally.
Why This Is Useful
If your project contains multiple matching Shape Layers, they can all reference the same Radius value.
Change one Slider.
All corners update.
Master Style Controller
Create:
CTRL — STYLE
Add:
- Corner Radius;
- Stroke Width;
- Primary Color;
- Secondary Color.
Now a complete interface design can be restyled from one place.
Animate UI Style
You can even animate:
Corner Radius
to transition between styles.
For example:
Sharp corporate cards
↓
soft consumer-style cards.
Round Corners + Audio
You could connect Radius to audio amplitude for a stylized effect.
For example:
Quiet:
small Radius.
Loud:
larger Radius.
This is more experimental than practical, but it demonstrates that Round Corners is a fully animatable property.
Round Corners + Time Expression
You could use mathematical expressions to make Radius change continuously.
However, because Radius has practical bounds, don’t simply let it grow forever.
Use:
- sine waves;
- mapped values;
- Slider Controls.
Oscillating Radius
Conceptually:
Radius = base + smooth oscillation
This can create a gently breathing Shape.
Use with Caution
Constantly changing corners can become distracting.
Use procedural Radius animation when it supports the design.
Project 12: Soft Blob-Like Geometry
Start with a simple polygon.
Add substantial Round Corners.
Animate:
- vertex positions;
- Rotation;
- Scale.
The result can resemble an abstract blob.
Is Round Corners Enough for Organic Blobs?
Not always.
For more fluid organic motion, you may need:
- path animation;
- Turbulent Displace;
- other distortion effects.
Round Corners is mainly for smoothing angular geometry.
Project 13: Animated Pill Button
Create a rectangle.
Use high Roundness or Round Corners Radius.
The rectangle becomes pill-shaped.
Add text.
This is common for:
- app UI;
- web interface animation;
- call-to-action graphics.
Responsive Pill Button
Combine with:
sourceRectAtTime()
so the button automatically resizes to match the text.
The rounded ends remain consistent as the label changes.
Example
OK
creates a short pill.
Start Free Trial
creates a longer pill.
The Radius remains visually consistent.
Project 14: Responsive Tag
Create:
Text
Auto-resizing background
Round Corners
Now you have a reusable label or tag.
This combines several techniques from the previous articles.
Use a Radius Based on Height
For a perfectly pill-shaped button, you can even derive Radius from the Shape’s height.
Conceptually:
Radius = Height / 2
Now regardless of button height, the ends remain fully rounded.
Why Expression Relationships Help
Instead of manually tuning Radius after every resize, the geometry calculates itself.
This makes templates much more robust.
Project 15: Animated Notification Bubble
Create a rounded rectangle.
Add:
- icon;
- text;
- badge.
Animate:
Scale 90 → 100.
Opacity 0 → 100.
Add slight overshoot.
The rounded geometry fits modern interface animation well.
Rounded Corners and Motion Design Style
Corner Radius is not merely technical.
It communicates visual character.
Sharp corners
feel:
- technical;
- formal;
- rigid;
- architectural.
Rounded corners
feel:
- friendly;
- modern;
- soft;
- approachable.
Use Radius intentionally.
Don’t Round Everything
If every Shape has maximum Radius, your design can lose visual hierarchy.
Mix:
- sharp;
- slightly rounded;
- heavily rounded;
depending on the role of each element.
Subtle Radius Is Often Enough
You may not need:
100 px.
Sometimes:
8–16 px
is enough to make a UI panel feel significantly more polished.
Scaling Affects Perceived Radius
If you scale the entire Shape Layer, the visible Radius also scales.
Consider whether you want:
- Radius tied to the Shape;
- or independent styling.
For reusable templates, test different Scale values.
Round Corners and Stroke Width
Large Stroke Widths can change the perceived softness of the Shape.
Evaluate:
- corner geometry;
- Stroke Join;
- Stroke Width;
together.
Stroke Join
Strokes have their own Join settings.
These influence how the Stroke appears around path corners.
This is separate from Round Corners modifying the actual path.
Round Join vs Round Corners
Again, they solve different problems.
Round Join
changes how a Stroke joins at a corner.
Round Corners
changes the underlying path geometry.
If you’re using a Fill, Stroke Join won’t affect the filled Shape.
Use the Right Tool
If only the Stroke looks too sharp:
try Round Join.
If the actual Shape geometry needs smoothing:
use Round Corners.
Custom Pen Tool Path
Round Corners is especially helpful after using the Pen Tool to create a Shape with sharp vertices.
Rather than converting every point into Bezier curves manually, try Round Corners first.
Manual Bezier Editing vs Round Corners
Manual editing
gives maximum control.
Round Corners
gives fast procedural consistency.
Use manual handles when exact curves matter.
Use Round Corners when you need fast, uniform smoothing.
Round Corners and Morphing
Animating Radius can contribute to Shape transformations, but it doesn’t replace true path morphing.
For complex Shape changes, you may still need:
Path keyframes.
Use Radius as Secondary Motion
For example:
Logo Shape moves into position.
Then:
Radius slightly increases.
This can create a polished settle.
Avoid Extreme Bounce on Radius
Rapidly changing corner Radius can look visually strange.
Use smooth interpolation.
Graph Editor
Radius animation can also be refined in the Graph Editor.
For example:
Fast initial rounding.
Slow final settle.
This helps integrate the styling change with the motion.
Common Mistake: Round Corners Doesn’t Work
Possible causes include:
- the operator is in the wrong hierarchy;
- the path has no suitable sharp vertices;
- another operator is changing the geometry;
- Radius is too small to notice.
Common Mistake: Expecting It to Round a Circle
A circle is already smooth.
Round Corners may have little or no visible effect.
Common Mistake: Radius Too Large
Excessive Radius can cause geometry to collapse or produce unexpected results.
Reduce the value.
Common Mistake: Using It Instead of Rectangle Roundness
For a simple Rectangle Path, the built-in Roundness property may be cleaner.
Common Mistake: Ignoring Operator Order
Round Corners before Merge Paths and after Merge Paths can produce different results.
Common Mistake: Confusing Round Corners with Stroke Round Join
Remember:
one changes geometry.
The other changes Stroke rendering.
Common Mistake: Everything Is Rounded Equally
Design intentionally.
Not every element needs the same Radius.
Common Mistake: No Master Control
For a reusable interface system, link related Shape Radius values to one Slider.
Round Corners Quick Reference
Radius = 0
No smoothing.
Small Radius
Subtle softness.
Medium Radius
Modern UI-style appearance.
Large Radius
Strongly rounded geometry.
Very Large Radius
Can significantly alter or collapse small Shapes.
Five Round Corners Exercises
Exercise 1 — Square
Animate a square from sharp to rounded.
Exercise 2 — Triangle
Create a softer play-button shape.
Exercise 3 — Star
Experiment with large and small Radius values.
Exercise 4 — Custom Path
Draw an angular Shape using the Pen Tool and smooth it.
Exercise 5 — Merge Paths Icon
Combine two rectangles, then round the final geometry.
These exercises will make the behavior clear quickly.
Practical Project: Rounded Plus Icon
Create two rectangles.
Use Merge Paths:
Add.
Then add Round Corners.
Increase Radius slightly.
Now you have a modern plus icon.
Animate Rotation:
0 → 45°.
The plus becomes an X.
Practical Project: Responsive CTA Button
Create:
BUTTON TEXT
BACKGROUND
Use sourceRectAtTime() for automatic sizing.
Add Round Corners.
Expose:
Horizontal Padding
Vertical Padding
Corner Radius
Now the button can adapt to any text label.
Practical Project: Animated UI Card
Create a rectangular card.
Round its corners.
Add:
- title;
- icon;
- number.
Animate the card onto the screen.
Duplicate it for dashboards and infographic layouts.
Practical Project: Procedural Tile Grid
Create one rounded square.
Add two Repeaters.
Build a grid.
Animate:
- spacing;
- Radius;
- Scale.
This creates a sophisticated repeating UI animation from one Shape.
Frequently Asked Questions
What does Round Corners do in After Effects?
It procedurally smooths sharp vertices in Shape Layer paths.
Where is Round Corners?
Select a Shape Layer and choose:
Contents → Add → Round Corners.
What does Radius control?
It controls how strongly the corners are rounded.
Can Radius be animated?
Yes.
Can I round a triangle?
Yes.
Can I round a custom Pen Tool path?
Yes, provided the path contains appropriate corner vertices.
What’s the difference between Round Corners and Rectangle Roundness?
Rectangle Roundness belongs specifically to Rectangle Paths, while Round Corners is a Shape Layer operator that can affect more general paths.
Can I combine Round Corners with Merge Paths?
Yes.
Can I combine Round Corners with Repeater?
Yes.
Can I combine it with Trim Paths?
Yes.
Can I control Radius with a Slider?
Yes.
Can I create pill-shaped buttons?
Yes. A high Radius relative to the Shape height creates pill-like geometry.
Is Round Corners the same as a round Stroke join?
No. Round Corners modifies path geometry; round joins affect how a Stroke is rendered.
Do I need a plug-in?
No. Round Corners is built into After Effects Shape Layers.
Practice Round Corners in After Effects
Start with one polygon.
Add:
Round Corners.
Change:
Radius 0 → 100.
Observe the result.
Then try:
- triangle;
- star;
- custom path;
- merged Shape.
Next, animate Radius.
Finally, combine it with Repeater.
This will quickly show you when Round Corners is useful and when a different Shape Layer property is more appropriate.
If you’d like to practice these Shape Layer techniques yourself, you can explore Adobe’s current After Effects options here:
Get Adobe After Effects and start creating polished Shape Layer animations
What Should You Learn Next?
Round Corners changes the character of vector paths by smoothing vertices.
The next useful Shape Layer operator is:
Offset Paths.
Offset Paths can expand or contract Shape geometry procedurally.
It is useful for:
- outlines;
- borders;
- expanding shapes;
- logo animation;
- growing interfaces;
- transitions.
The next article will therefore be:
How to Use Offset Paths in Adobe After Effects: Expand and Contract Shape Layers.
We’ll cover Amount, Line Join, animated outlines, growing shapes, logo effects, and how Offset Paths interacts with Merge Paths and Repeater.
Final Thoughts
Round Corners is simple, but it can make a major difference to the visual character of your After Effects graphics.
The basic workflow is:
Create Shape
↓
Add Round Corners
↓
Adjust Radius.
But its real value appears when you combine it with the rest of the Shape Layer system.
Use:
Merge Paths
to create complex geometry.
Use:
Round Corners
to soften it.
Use:
Repeater
to generate patterns.
Use:
Trim Paths
to animate lines.
Use:
Expression Controls
to make the result reusable.
That’s how small Shape Layer tools begin turning into complete procedural motion-design systems.
Explore Adobe After Effects and start building polished Shape Layer graphics






